|
Written summer 2000.
I have wanted a Mini Pick-up for around 10 years now. I've always had it very
clear in my mind what I wanted to do with it, but as always I had little time,
to indulge myself and customers cars always come first.
The introduction of our new Mini Majic kit for the Pick-up, Van, and Estate
however, gave me the ideal excuse - and I didn't hesitate. After several
conversations with trade customers a deal was done with Minis Cars & Parts,
in Cannock, for one pretty grotty - but never the less genuine looking pick-up.
It had full MOT and after a visit to the post office was driven back 200 miles
to our Norfolk Workshops.
Now the silly bit - after looking it over I told the boys at our bodyshop
what needed doing - and then that I would like it ready for Mini-in-the-Park,
which was then exactly 2 weeks away!!! The boys added up the workload which came
to over 400 hours, divided up the work and everyone pitched in including several
overnight shifts in the week preceding the show. It was built, painted and
reassembled almost in time - but with 4 hours before we had to leave for the
show, we finally admitted defeat with the car only partly assembled.
The specifications listed below do not do justice to the work required, and I
have to thank the staff whom went well beyond the call of duty in trying to
finish this car in time. No corners were cut to get it done in time - we all
just did massive hours!
- Fully de-seamed, including uprights, gutter, wing tops, wing
bottoms, cab joints, rear panel joints, A panel joints, and roof at B
pillar.
- Mark 3 doors fitted, which involves changing the entire door
aperture - every dimension on the Mk2 and Mk3 doors are different. We
had to change the A post, A panel, door step, sills, B pillar, and
door frame surround - a huge job which was only completed in time
because DSN had the panels in stock late Saturday afternoon when we
decided to go ahead with the conversion.
- Full Majic Pick-up bodykit fitted and blended into bodywork.
- All paint stripped from vehicle, for bare metal respray, in
pearlescent custom mixed blue.
- Front indicators flushed over and moved into bodykit.
- Redundant wiper holes blanked out.
- All pick-up bed cover mounting holes welded up.
- Twin round rear lights from our Mini taillight conversions fitted.
- Pillar-less doors, with custom made door handles, and electric M3
mirrors.
|
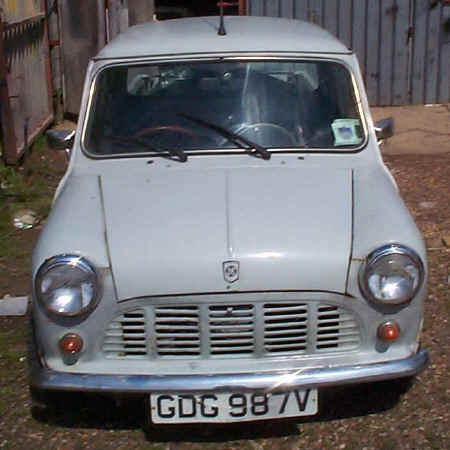
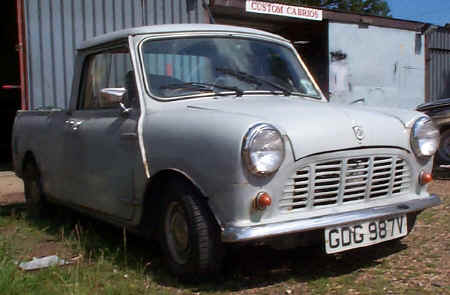
Project started 5/8/00. One grey standard Mini
Pick-up, not every one can see the potential, but we can. Surface rust
everywhere persuades us to strip all paint from the outer shell, and all
the filler too!
Engine in bed is reportedly a 1340cc - ideal for
Project except that it turned out to be an 850cc - oops. The lesson is
check it out fully when buying, and don't trust the seller because he
may not have checked it out either.
|
 |
 |
 |
 |
 |
 |
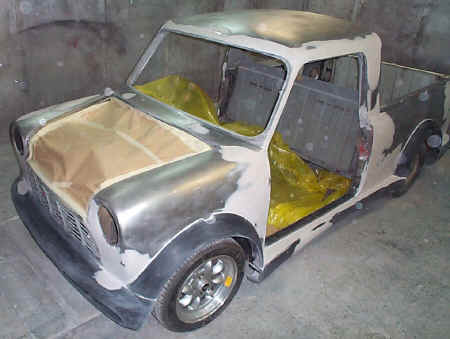
The first job is to strip all glass and lights etc from
the shell. This is followed by removing all paint using a grinder with a
flexible disk and then by sanding with an orbital sander. The process
takes about 8 hours to complete.
Next the seams are removed and welded up. This is a
specialised job that we have seen messed up by customers many times - good
quality welding is the secret - so you don't have to grind the weld off.
Then all that is needed in a relatively small amount of filler.
You will notice that the photos jump over the Mark3
door conversion, which is completed in the photos - it took a great deal
of time and effort - we just forgot to take photos! |
 |
 |
 |
The Mark 3 doors were fitted by chopping out almost the
entire door surround and replacing it with new panels. The heritage
complete door step/A pillar panels made life a little easier but it still
took quite a bit of time.
The old quarter panel repair seen in the photo was carried out by a
previous owner - but was spot welded and most welds had broken under the
filler. We seam welded it, and you can just see the Custom Cabrios special
galvanized sills - considerably thicker than standard, and somewhat better
at resisting rust!
The new B pillar was also welded in and an old door used to judge the
gaps - new heritage doors were fitted to the shell prior to painting. |
 |
 |
 |
 |
 |
 |
 |
 |
 |
 |
 |
The final stages of the project are like any other -
fit the bodykit, then remove it and bond it on a piece at a time.
Sand the kit and the car, fill dents and repairs and
when ready clean it and prime it.
Primer is blocked down, prior to painting, and
re-assembly of the vehicle.
Two weeks was a ridiculous target - and we very nearly
made it!
Interior and engine dressing to follow, along with the
impreza bonnet I really wanted, and the GRP tailgate, lecy windows,,,,,,,.
It looks every bit as good as I have imagined it for
the last 10 years. |
Phase TWO
|