|
Kit now available for NEW
Generation MINI!!!
Our dedicated fit Lambo Door conversion
for the BMW MINI is by a long way the highest lifting MINI kit available
anywhere in the World. Although the kit is a bolt on
kit, because the original hinges are welded to the car and have to be cut off
the conversion, although the conversion is fully reversible if needed.
We have put a lot of development into
these kits - please do not confuse them with modified Civic kits which you may
see elsewhere. These kits are absolutely the best available - at any price.
-
The kits include bearings which do
not wear.
-
The kits are accurately made in Jigs.
-
All parts are CAD designed, CAM
Machined under full CNC control.
-
Very heavy duty 12mm plate not flimsy
soft 6mm or 10mm you see elsewhere.
-
Kits open further than other lambo
kits so you don't have to be a Limbo dancer to get in - just look how far they
open, and how far clear of the wing the door is - you can see air between the
two, meaning no damaged door cards like you get with Honda kits.
Prices have now been reduced to £750 for the kit and £1700
fully installed.
As you can see we do a few MINI's!!
If you wish to see the conversion in
the flesh then two of the development cars are our own and may be available to
view, by appointment.
|
What is included
in the kit:- |
| |
|
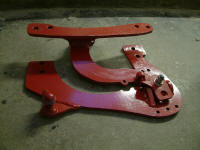
| Pair on door conversion mechanisms.
(Old style LK300 pictured) |
 |
| Pair of support rams with ram covers. |
|
| Bolts/Washers. |
|
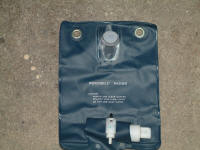
| Replacement Washer bottle. |
 |
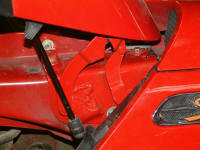
| Pair of new Bonnet hinges.
|
 |
| Tap set (used to tap hinge blocks for
bolts). |
|
| Drill bit - correct size for tap. |
|
|
Note - Trade orders do not include the tap set or drill
bit, unless specifically ordered. |
|
Fitting instructions for
the BMW MINI. |
|
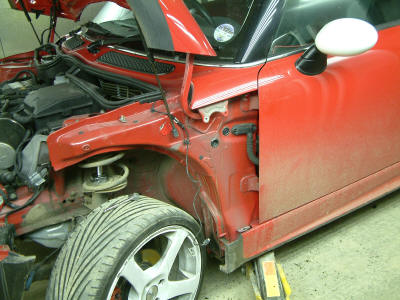
Open the bonnet and remove the battery connections.
Remove the front wings, and washer bottle(s).
Note. Headlamp washers will not work when the
conversion is complete as the pump moves the washers and the pressure is
no longer high enough.
Remove the checkstraps from the door and the wiring
multi-plug.
Whilst the door is easy to work on its worth while to
remove the door card - 4 torx fixings and then standard clips (do not
forget the fixing under the reflector).
Remove the bonnet hinges (you do not need to remove the
bonnet, but it can be easier to do so)
With the help on an assistant remove the door itself. |
 |
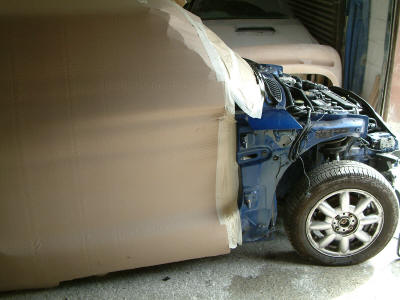
| Carefully mask up the windscreen and the
car itself. The sparks from cutting through the hinge will burn or melt
almost anything so be very careful.
The idea is to cut the large lump on the hinge leaving a flat area for
the mechanism to be bolted onto. The grinding should therefore be done
very carefully. We use a 9 inch grinder for speed and |
 |
|
Wearing gloves, goggles and taking extreme care cut the
hinge.
Once cut off with the large grinder, we then tidy it up
with a smaller 4.5 inch hard disc grinder, making the surface as flat as
we possibly can. Then we tidy it again with a fibre disc grinder (as
below).
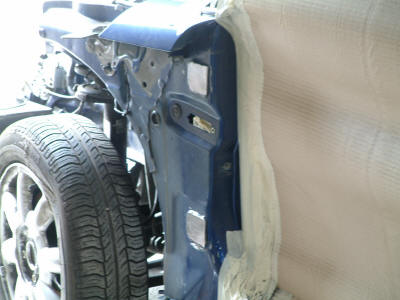
The place the door back into position, and bolt the
mechanism into place on the door, it re-uses one of the hinge mounting
holes. The other holes have to be marked and drilled. Mark and punch the
centre of the other four mounting holes. It is important to mark the
centre because you need the adjustment that this offers.
Use the tap set to tap the holes out. The mechanism can
now be bolted into place. |
 |
 |
 |
 |
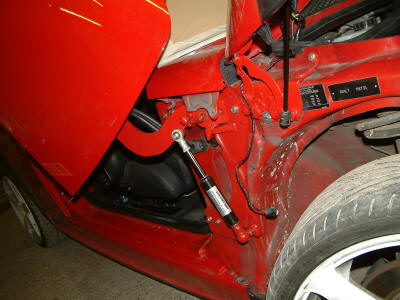
The black ram supports the weight of the door and must
be fitted separately. After fitting the mechanism have an assistant lift
the door.
Fit the ram to the bottom fixing, and then have your
assistant hold the door at the correct height so that the top fixing
aligns with the hole in the arm - bolt it up using the two spacer washers
behind the top rose joint.
You can now let go of the door - it will hold itself,
and should now lift and lower correctly!
The Lower position adjuster can be set so that when the
door is fully down (but not closed) the striker and catch align correctly.
Turn the screw clockwise to lift and anti-clockwise to lower the door. |
|
The washer bottle (or bag) is fitted as in the picture.
The bag needs the original BMW pump removing from the original plastic
bottle. Then remove the pump from the new bag and install the BMW one. You
will have to put a small cut in the retaining strap to allow the slightly
larger BMW pump to fit.
Drill the holes as required in the plastic bulkhead as
per the picture and gently feed the bag down past the brake lines. The bag
is rated at 1.8 litres which is the slightly less than we have measured
the original at (2.00 litres) so it is likely it will need filling more
regularly.
Only one bag is supplied so if you have headlight
washers you will need to purchase another bag. |
 |
|
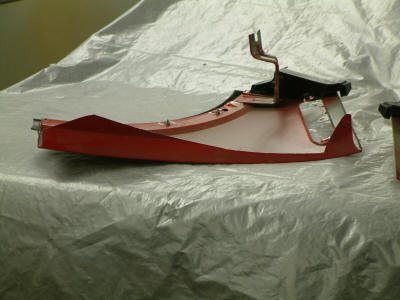
The wings need slight modification to allow the arm to
pass through. They need to be cut as per the photo but you should cut it
as required for your particular car.
We recommend cutting, and not snipping and folding
because it looks tidier. The wings are thicker than most cars and
because of this do not distort provided that you are careful. Keep as
much metal as possible, and we recommend NOT to use tin snips as they
distort everything!
The wiring does NOT needs to be extended. The wiring in
the door is generous enough meaning that you can keep everything
original, it just needs rerouting and cable tying securely in a more
optimum route! |
 |
 |
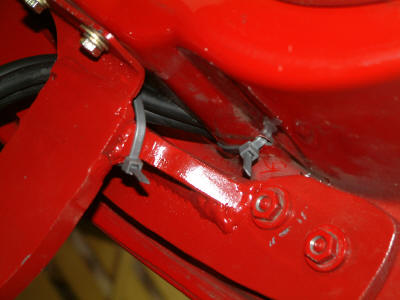 |
| The wiring should also be secured within the
inside of the door (near the speaker), so it can not come loose when the
door is in the open position. |
|